Starting your first article is simple. You can access the editor in two ways:
Navigate to your profile menu.
Select Write.
Once you access the editor, a draft will be automatically saved, allowing you to start typing immediately.
Introducing the Johannes Editor
DevTricks utilizes the Johannes Editor, a block-style editor inspired by WordPress’s Gutenberg and Nation editors. It offers a comprehensive set of features expected from a modern text processor, ensuring your writing experience is both efficient and enjoyable.
Key Features of Johannes Editor
Block-Based Structure: Organize your content using different block types.
Rich Text Styling: Enhance your text with a variety of styling options such as bold, italic, underline, strikethrough, hyperlinking and colors.
Editor Components
The Johannes Editor is divided into two main components:
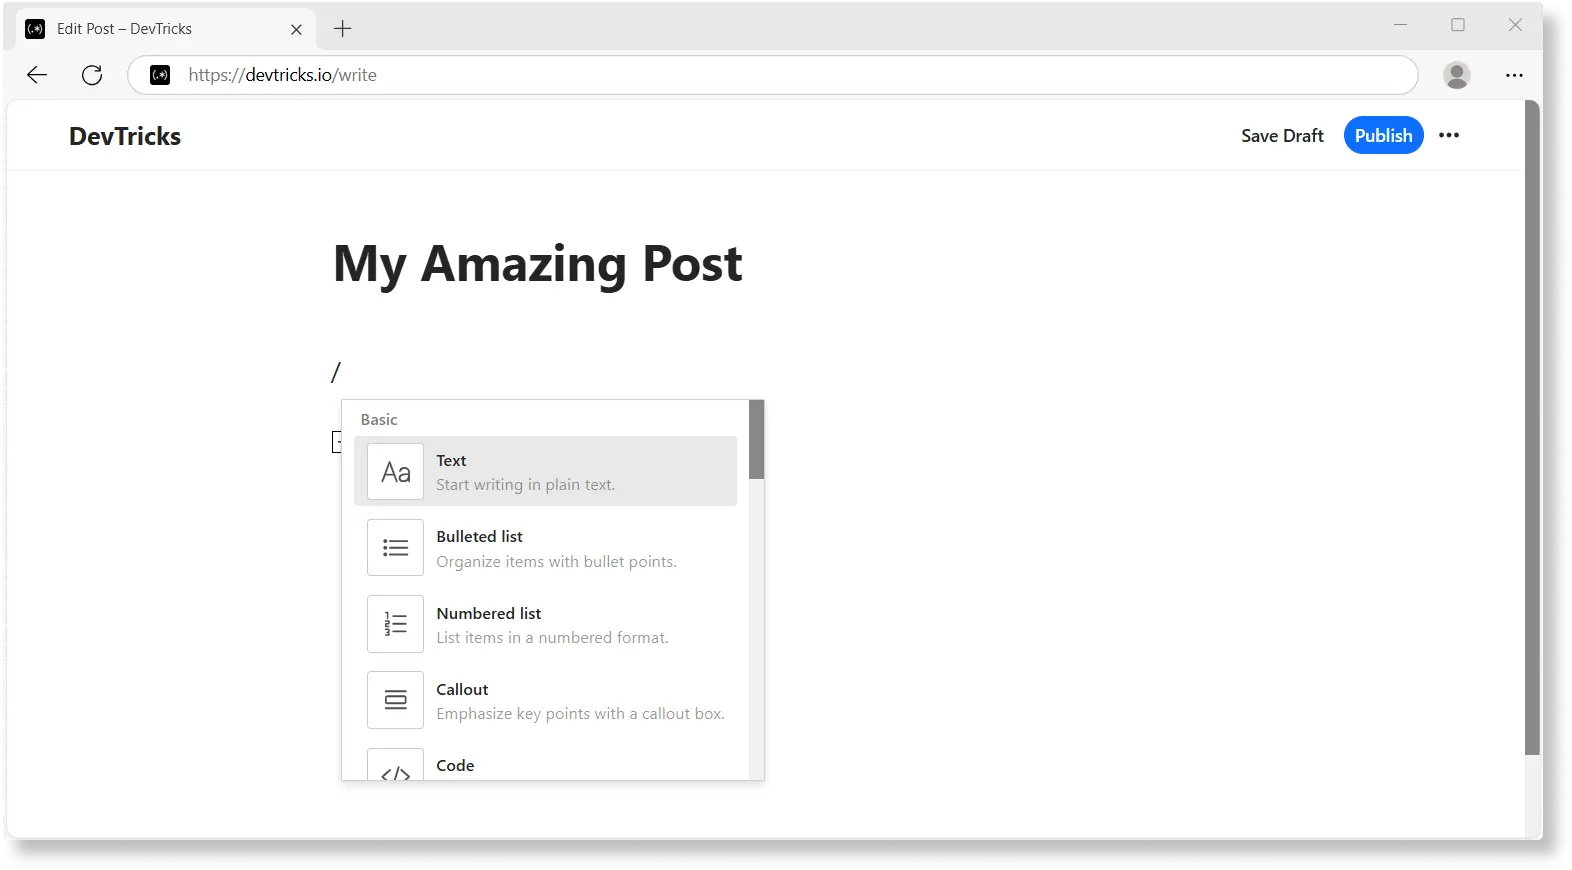
Activation: Press / (slash command) within an empty block.
Function: Lists all available block types for easy insertion.
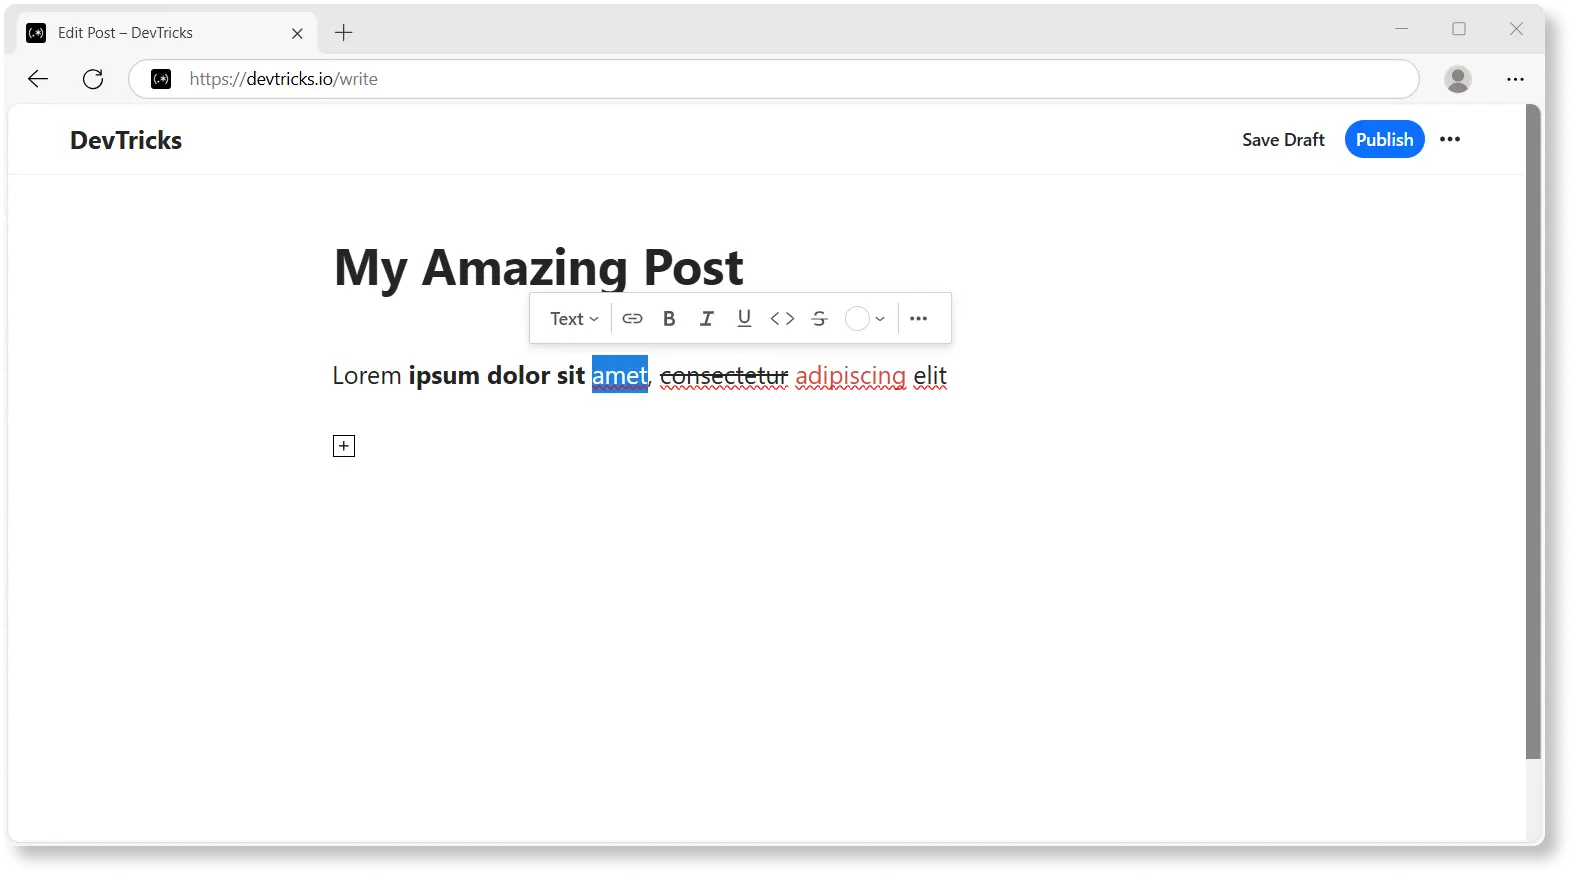
Activation: Select a portion of text.
Function: Provides context-specific text styling options.
Quick Menu
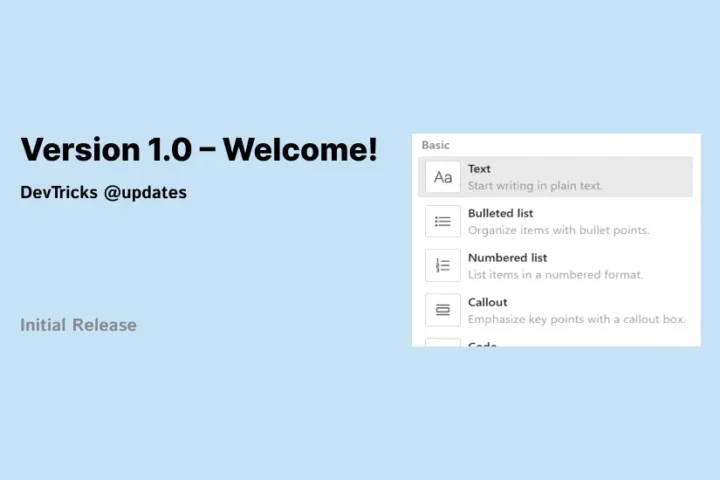
The Quick Menu allows you to choose from a variety of block types to structure your article effectively. To access it, simply press / while in the editor.
Text: Plain text for paragraphs.
Image: Images to enrich your publication.
Bulleted List: Create lists with bullet points.
Numbered List: Create ordered, numbered lists.
Headings (H1 – H6): Add headers of varying levels for better content organization.
Embed: Embed content from YouTube, CodePen and Spotify.
Styling Your Text
Enhance your text using the Floating Toolbar, which appears when you select text.
The toolbar offers a range of styling options:
Bold
Italic
Underline
Inline Code
Strikethrough
Change Text Color: Modify the font color to highlight important sections.
Change Background Color: Add background colors to emphasize specific text.
Transform Block Types: Easily switch between different block types as needed.
Keyboard Shortcuts
Boost your productivity with these handy keyboard shortcuts:
Press Ctrl + Shift + Enter to convert the block to a text
Press Ctrl + . to convert the block into a bulleted list
Press Ctrl + / to convert the block into a numbered list
Press Ctrl + 1 to convert block to a to-do list
Press Ctrl + Alt + 1 to convert block to Heading 1
Press Ctrl + Alt + 2 to convert block to Heading 2
Press Ctrl + Alt + 3 to convert the block to Heading 3
Press Ctrl + Alt + 4 to convert the block to Heading 4
Press Ctrl + Alt + 5 to convert the block to Heading 5
Press Ctrl + Alt + 6 to convert the block to Heading 6
Additional Tips for Effective Writing
Use Headings Wisely: Structure your article with appropriate headings to improve readability and SEO.
Incorporate Images and Embeds: Visual elements can make your content more engaging and informative.
Leverage Lists: Use bulleted and numbered lists to present information clearly and concisely.
Style for Emphasis: Utilize bold, italic, and other text styles to highlight key points and important information.
Optimizing Your Article for Maximum Reach
To ensure your article reaches the widest possible audience and engages readers effectively, consider optimizing it with relevant tags and an eye-catching thumbnail.
Adding Tags to Your Article
Including tags in your article is not mandatory, but it plays a crucial role in content discovery and recommendation. By associating your article with appropriate tags, you enhance its visibility to the right audience, leading to better engagement and conversion rates. Remember, you can add up to five tags per post.
Access the ‘More Options’ Menu: In the editor, click on the ellipsis icon (three dots) located in the top right corner.
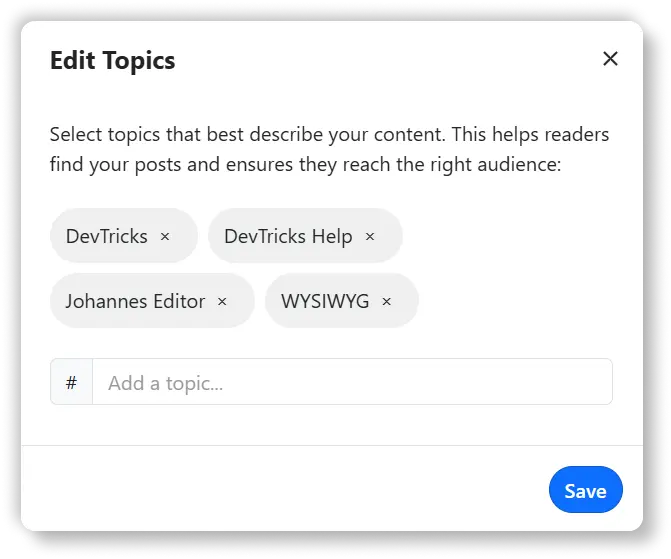
Select ‘Edit Topics’: From the dropdown menu, choose ‘Edit Topics’. A modal window will appear for managing your tags.
Add Relevant Tags: Begin typing the name of a topic that aligns with your article’s content. If the topic is popular and used in other articles, a list of suggestions will appear. You can select one from the list or continue typing to create a new tag. Press the comma key ( , ) or Enter to add the tag.
Save Your Tags: After adding up to five tags, click ‘Save‘ to apply them to your article.
By carefully selecting tags that reflect your article’s themes, you improve its chances of being recommended to readers interested in those topics.
Including a Thumbnail
Adding a thumbnail image to your post is optional but highly beneficial. A compelling thumbnail can significantly increase the click-through rate when your article appears in feeds or recommendations, making it more likely to attract readers.
Access the ‘More Options’ Menu: In the editor, click on the ellipsis icon (three dots) in the top right corner.
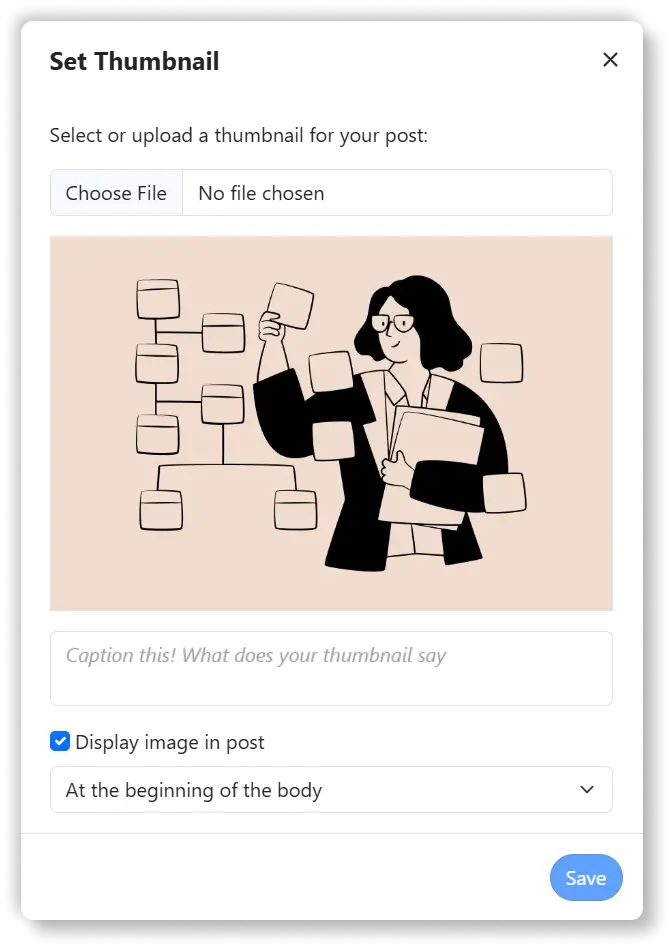
Select ‘Edit Thumbnail’: Choose ‘Edit Thumbnail’ from the dropdown menu. A modal window will open, allowing you to upload an image.
Upload Your Image: Click ‘Choose File’ or the upload area to select an image from your computer. Opt for a high-quality image that represents your article’s content effectively.
Configure Thumbnail Display: Decide whether you want the thumbnail to appear within your article. If you choose to display it, select its position—either above the title or within the article content. If you opt not to display the thumbnail in the article, it will still be used in post listings and content recommendations, enhancing your article’s visibility.
Save Your Thumbnail: Click ‘Save’ to upload the thumbnail and apply your settings.
Using a striking thumbnail not only makes your article more appealing but also helps it stand out in crowded feeds, increasing the likelihood of attracting readers.
Saving and Publishing
DevTricks requires you to manually save your drafts. When you’re ready to share your article with the community:
Review Your Content: Ensure all sections are complete and well-formatted. Since the editor is
WYSIWYG (
What You See Is What You Get), what you see on the screen is exactly what readers will see.
Publish: Once satisfied, click the Publish button to make your article live.





Start the conversation!